
Your Cart is Empty
CANADA FREE SHIPPING WITH ORDER MORE THAN 100$ BEFORE TAXES *
CANADA FREE SHIPPING WITH ORDER MORE THAN 100$ BEFORE TAXES *
-
Login

Is your trail camera taking dark photos during the day, even though the sky looks bright? Before changing settings or suspecting a fault, check how your camera is aimed.
Including a large amount of sky in the image can make it harder to expose the ground properly. A small angle adjustment can sometimes make details on the ground and on animals easier to see.
A camera automatically adjusts its exposure to capture a scene. When the background is much brighter than the subject, it can be difficult to preserve details in both the sky and shaded areas.
Depending on how the camera measures light, the ground or animal may appear too dark. When light comes from behind the subject, this is called backlighting. A bright sky can also create strong contrast, even when the sun is not directly visible in the image.
Trigger speed alone does not explain a dark photo. Framing, the direction of the light and the contrast between the subject and background are all worth checking.
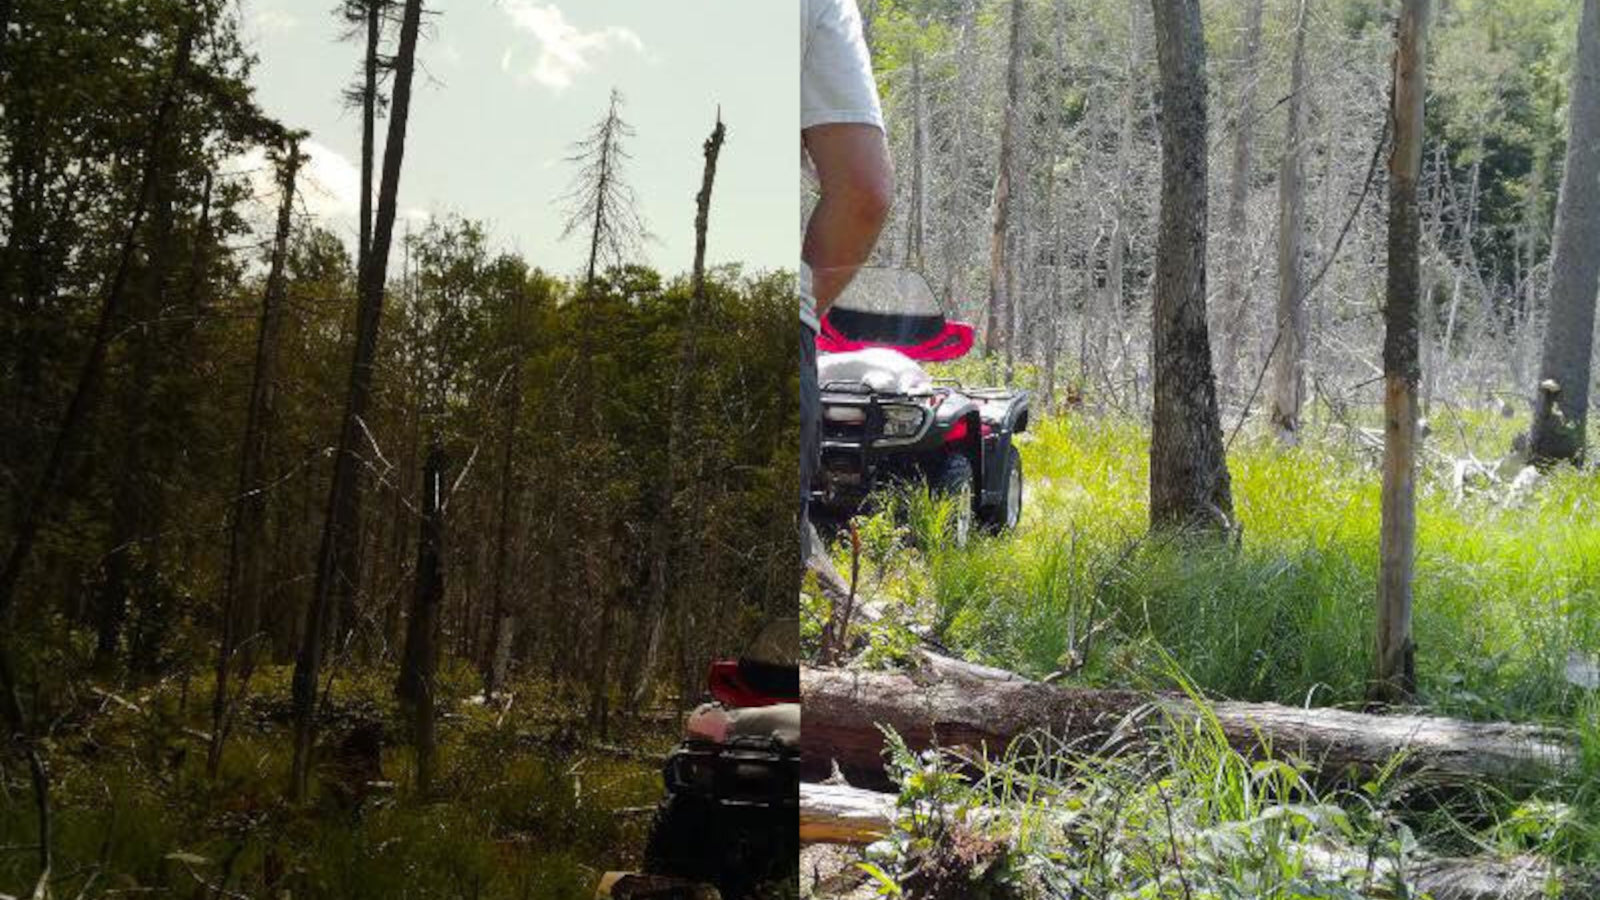
The following photos were taken at the same location, less than a minute apart. During this test, the camera was facing south.

In this first photo, the sky is prominent. The ground, ATV and person appear relatively dark.

After tilting the camera slightly downward, more ground and less sky are visible. Vegetation and foreground details are easier to distinguish.
The person also moved between the two shots. This comparison illustrates why framing is worth checking, but it does not establish that the angle adjustment alone caused the entire difference in brightness.
These archive photos are shown at 800 × 600 pixels. They illustrate framing and exposure, rather than the resolution of current camera models.
To better judge the effect of an adjustment, change one thing at a time and repeat your walk-through at a similar distance.
Whenever possible, avoid pointing the lens toward the sun, especially when it is low at sunrise or sunset. In Quebec and elsewhere in Canada, facing north can be a useful starting point for reducing direct exposure to the midday sun.
This is not an absolute rule: terrain, season, openings in the forest canopy and the animal travel area should also guide your choice. A south-facing camera can produce good images when lighting and framing conditions are suitable.
Before leaving the site, check how much sky appears in your photos. If the area you want to monitor remains dark, try reducing that portion while keeping the travel area properly framed.
Did the adjustment help? Share your before-and-after photos with us and explain what you changed.
Comments will be approved before showing up.
